Friday, August 10, 2012
Spinach and Artichoke Fondue
Isn't it wonderful to have pre-prepared food in your fridge, just in time for the rainy days?
Call it coincidence, I have made a lot of it last week and tucked them in the fridge. Just in time when the heavy rain continuously poured down and flooded almost the whole of the metro and some provinces. Some roads were already not passable since late Monday night. Thank God I made it safe from my husband's office. I had to take him there as he has a flight to Cebu for a business trip on Tuesday. I made it home past 11PM at turtle speed. The wipers cannot much fight the strong rain no matter how fast it swishes.
So we live in the east and we were part of Ondoy's history. This time, however, our street was spared from the flood but the entrance to our village and the first streets were flooded, knee-deep.
Since I already made cheesy spinach dip, The next on my "to try" list is to re-create Cyma's Spinach and Artichoke fondue. I have searched for and saved recipes that are close to it or at least can lead me to the right direction and I then just added other ingredients.
Here's what i used:
about 500 grams of spinach leaves (can use more as the leaves will wilt after you boil them)
about 1 1/2 cup artichoke hearts
about 1 cup of sun dried tomatoes sliced thinly
olive oil
about 4 cloves of garlic minced
1 tub sour cream
1 block of cream cheese
1/2 cup quick melting cheese
1/4 cup parmesan cheese for the mixture + 1/4 cup for topping
about a tablespoon of feta cheese
mozarella cheese
1 chicken bouillion cube
milk or water (to act as a thinner)
salt and pepper to taste
lemon slices, toasted bread slices to serve
Directions: boil spinach and artichoke until tender and discard liquid, chop leaves and artichoke to your liking, set aside.
in a pan, heat oil and saute garlic, put on low heat and pour the sour cream and cream cheese. mix well until texture is soft and creamy. put in spinach, artichoke, sun dried tomatoes, quick melting cheese, parmesan cheese, feta and the chicken cube. add milk or water if its too thick, then salt and pepper to taste (or just pepper if you find it salty already)
assemble the dip on a baking pan, sprinkle with parmesan and mozarella cheese and pop in the oven toaster for about 10 to 12 minutes until top is a bit toasted. (my toaster is at 175C)
Serve hot with toasted bread or pita, also great when drizzled with a bit of lemon juice.
For the past few days, aside from the flood, it was a busy time for work too (though it has always been busy at work). This has saved me during breaktime and beyond!
Glad that as of yesterday, the rain stopped, the flood gone almost all over. The sun is up and I look forward to sunnier days ahead. Have a great weekend everyone!
Wednesday, June 27, 2012
Cheesy Spinach Dip
Best eaten with toasted bread, or like what you see on the photo, I used Fita biscuits (my favorite combination!). The other time I ate it with soda crackers, but it was just so-so!
Wednesday, May 30, 2012
Potato Gratin with Creamy Cheese Sauce and Bacon Bits
Wednesday, April 11, 2012
Dulce de Leche Vanilla Cupcakes

Happy Easter! :)
As happy as Easter, I am delighted to share with you that I have made my first vanilla cupcakes from scratch. My good friend, Kitty has requested for vanilla-ish cupcakes. After searching for recipes, I believe I found inspiration from Magnolia Bakery's Vanilla cupcakes.
The Magnolia Bakery recipes I found in sites use self-rising flour + flour combination. I have no access to self-rising flour here so I researched on how to make it. It also requires 2 cups of sugar and 2 sticks of butter.
One of my best friends, Toni, who's based in LA, mentioned to me that she finds the original too sweet and a bit dry (must with the butter cream frosting?) I value her opinion a lot. So for the sugar, I reduced mine to 1 and 3/4 cups.Also, based from my experiences in using butter alone (in cakes/cupcakes), the output usually ends up on the dry side even if I "undercook" it. So with that, I also added oil in the recipe.
The use of Dulce de Leche as topping was inspired by Estrel's Caramel Cakes. I've been dreaming to try it since Archie's a fan but I was scared to try out chiffon! While I was at the planning stage for these vanilla cupcakes, there was a light bulb moment and I had a strong feeling that Dulce de Leche would be a perfect topping.
And it was! Husband-approved. Yey!
So without further ado, here's my take on Vanilla Cupcakes (inspired by Magnolia Bakery's Vanilla cupcakes):
2 and 3/4 cup all purpose flour
2 1/4 tsp baking powder
3/4 tsp salt
1 cup (2 sticks) unsalted butter, softened
1/4 cup vegetable oil
2 cups sugar
4 large eggs, at room temperature
1 cup milk
1 teaspoon pure vanilla extract
Preheat oven to 170C/350F. Line cupcake pans with liners and set aside. Mix flour, baking powder and salt. Set aside.
Put softened butter in a bowl. Cream butter until smooth. Add sugar, mix until fluffy, about 3 minutes. Add eggs, one at a time.
Add dry ingredients in 3 parts, alternating with the milk and vanilla. Mix well.
Fill the cupcake liners with the batter, about 3/4 full, pop in the oven, rotate pan halfway through.
Bake for 18 to 20 minutes (or 22 minutes max, in my opinion)
Let cupcakes cool on a wire rack. Serve plain, or with your favorite topping/frosting.
The cupcakes were a bit crusty on the outside, moist on the inside. The crusty part eventually became softer and moist after a few hours.
Note to self: On the next batch, I will add some more oil, maybe 2 more tablespoons, and will try a combination of brown sugar and white sugar to make a moister cupcake.
For the Dulce de Leche, as you can see in the photo, I made it 2 weeks ago and stored in the fridge. Tips and directions can found in Manang's blog :)
Remove label of condensed milk and clean the can. Boil the can of unopened condensed milk for 2 hours in a pressure cooker, or 4 hours in a regular pot.
Fill the pot with water and make sure there's enough water to cover the whole can. About 2 to 3 inches above the can is okay.
After the boiling process, set aside first and leave the can to cool before opening.
Spread over the cupcakes and enjoy! :)
Wednesday, March 21, 2012
Scrambled Eggs with Chorizo and Bell Peppers
Can I just drop by real quick to say I'm stll here? :) Yes I am. Of course, still busy as always!
I am so amazed with Instagram that I had to post this shot as/for my comeback post.
I hardly post breakfasts here, not that I don't love breakfast, but I just (sad to say) have no sweet time to prepare breakfasts specials for the past few years, given the erratic schedule that Archie and I have, plus our school boy. Pre-school at this time is not all-play. Did I mention I make reviewers for exams? Did I mention that we have homework almost every-single-day? If you're an '80s or '90s kid, in your head I can hear you say WT_ for that. But really, I can honestly say, it's good training for our boy! :)
Today is one of the lucky days/lucky mornings that I rarely had - that I was able to prepare a breakfast special with my pantry's special guest: the Spanish Chorizo. I got it from Santis Delicatessen. This is actually a justified version of what I tried to make 2+ years ago. I am a longganisa fan since birth, so Chorizo is no exception. My bosses gave us an authentic spanish chorizo back in Dec. 2009 and I tried to put it together with the same cast (peppers and eggs) though aesthetically didn't look cute hehehe but reeeeeaaaaaaallly tasted soooo goood! Since then I craved for it but never met a nice chorizo since last weekend. So here you go with my initial breakfast special this year:
Chorizo:
vegetable oil (about 3 tablespoons)
1 small onion, chopped
2 cloves garlic, minced
1 green bell pepper, sliced
1 red bell pepper, sliced
Spanish Chorizo (it's about 8 inches long), sliced
salt and pepper to taste (easy on the salt as the chorizo is already tasty!)
Eggs:
vegetable oil (3 tablespoons)
6 small eggs
3 tablespoons milk
salt and pepper to taste
First, heat oil on your skillet, sauté the onions until translucent, add the garlic, then the bell peppers, then Chorizo. Mix everything until Chorizo is done and its own orange oil is already out.
When finished, put the chorizo and peppers on a plate / bowl and set aside.
For the scrambled eggs - before you start, slowly and carefully clean your pan with a paper towel to remove the oil, unless you want your eggs to be orange in color :)
After cleaning up, beat eggs, milk, salt and pepper, heat oil on your skillet, then gently pour the egg mixture on the pan. make it low heat, then scramble!
You may want to put the eggs beside the chorizo on your bowl/plate, or you may also present it as what you see on the picture above. Serve with garlic rice or bread, or eat as is. I super like eating it with Ciabatta bread.
Mmmmm I can still smell it's fragrance.
Well, good morning everyone! :)
Saturday, January 28, 2012
Christmas Chocolate Cupcakes

2 New Years have passed this month!!! Happy New Year and Happy Chinese New Year to all!
Hope everyone had fun during the holidays! Mine was! It was pretty much packed with reunions here and there, cooking, baking, gift wrapping and last minute gift shopping! With work still included, you can say it was really a busy holiday!
Sharing a photo of the Christmas-themed Chocolate Cupcakes I made for my cousin Kuya Bobby and his wife Ate Pam.
I used Hershey's Perfect Chocolate Cake recipe for the cupcakes. They are soooo moist and chocolatey. This recipe never failed me! This makes 24 cupcakes, or even 30 if you fill the pans halfway only. I also use this for our chocolate caramel cake!
For the butter cream frosting, I used Wilton butter cream icing recipe. I just lessened the amount of the powdered sugar to 3 ½ cups as it can be really sweet.
Read: DIABETIC :)
I got the Christmas toppers from Manna Ingredients. They have loads of stuff there for baking,food packaging etc. I am happy to say that they don’t overprice their goodies. Promise. So to anyone there who will come across this entry and if you’re at the East side of Metro Manila, go ahead and visit their humble store. It’s along Marcos Highway, beside the entrance of Town and Country Village.
Ok, I do know the fact that I have so much backlog and making up to do! I wish I can still find time somehow to share something here – at least once a week to or maybe once in 2 weeks? monthly? Quarterly? Tell me about it.
With all the busyness before and what’s going on, though I am still very much inspired to cook (never lost that touch, thank God!) I feel that along the way - I lost the inspiration to write... Or, was I just too tired or too preoccupied?
Signs, signs, signs.
On a positive note - I believe that this year has a lot of beautiful promises. I will just go with the flow and try to stay focused at least 99% of the time, if not 100%!
This year’s going to be busier in all the corners of my life as an individual, a mom and a wife (no, Archie is not into politics, he’s just going to be busier too!). Despite that it will be busier; I will try my best to rest more, play more, reunite myself with writing… and playing the guitar (this is another side of me).
Well, here I am, back for the new year! So, here's to a busy but wonderful, healthy, happy and successful 2013 to all! And here’s to another entry next week!? :P Cheers!
Friday, October 14, 2011
Ham, Cheese and Chili Crepe

Changes, changes... as they say, there is nothing constant in this world except change.
When change comes, I press the panic button before trying to step back a little to understand what is going on and think things through. When I panic, I usually make mistakes. tsk tsk.. Though sometimes, I am happy to say it's the other way around. Yes, just sometimes.
At least! :)
I wish changes, in all forms, is just as easy as changing your weekend food. I didn't go full circle, but I just tried to have something we don't usually have. Crepes. Oh yes, it's refreshing and rewarding after the changes, panic and the boo-boos... my boo-boos! :S
This is a savory crepe inspired by Café Breton's Vesuve. Sheila had me try this back in December and I instantly loved it.
For the ham filling, you'll need:
vegetable oil
1 small onion, finely chopped
about 6 cloves of garlic, minced
3 to 4 ripe tomatoes, finely chopped
8 slices of cooked ham (not sweet), diced
Chili pepper flakes (start with half a teaspoon for a mild spicy kick)
pinch of salt and pepper
1/2 bar of quick melting cheese (this is about 100 grams, you can grate a little extra of you want)
Prepare the filling - heat the oil and sauté the onions until translucent, add the garlic, then tomatoes. When tender, add the ham, then sprinkle the pepper flakes, add just a pinch of salt and pepper. Set aside.
For the basic crepe recipe, I got it from the book Joy of Cooking. I just made a little changes below:
1 cup all purpose flour
3/4 tsp salt
1 cup warm milk
1/2 cup warm water
4 eggs
4 tablespoons butter, melted
extra 6 teaspoons of butter (for the pan)
mix dry ingredients (flour, salt or sugar) and set aside. melt butter, set aside
in a large bowl, mix the milk, water, eggs and add melted butter. Mix well
slowly add the dry ingredients by sifting it through the bowl, then mix thoroughly until there are no lumps anymore. I like my milk and water warm as it dissolves the dry ingredients faster.
Note: This makes about 6 crepes. I am using a 9-inch non-stick pan. You can prepare the crepe batter ahead of time and store it in airtight container in the fridge.
To prepare the crepe, heat your pan, melt a teaspoon of butter and pour a ladle of the crepe batter (I pour about 1/2 cup) and tilt the pan in circular motion until you achieve the round form of the crepe. Cook until the bottom is ok, about 2 minutes on low to medium heat, like if you see a little toasted color under, then that's good.
Then in the center of the crepe, put about 2 tablespoons of the ham filling and a tablespoon or more of grated quick melting cheese, then fold the crepe. Careful on folding as the crepe tends to tear. I suggest you use two cooking spatulas/turners when you fold the crepe. If you want to cook/prepare all the crepes first, go ahead :)
The crepe batter is also good for sweet/dessert crepes. Just omit the salt and add 4 to 5 tablespoons of sugar (will post our dessert crepe soon!)
I am in the process of learning to accept the other side of change. That: it's not always bad, that it's not something to be scared about. I should think that change is also a step towards improvement. So here I am, resting on this well deserved weekend, preparing myself to embrace the changes that will come.
Happy weekend! :)
Friday, July 1, 2011
Cake Pops and a mini baby shower surprise

Nope, not me. My good friend Ross will be bringing her second little princess out in a few weeks . Ross was born with a sweet tooth but was under strict "sweets diet" in her childhood days because her mom was super taking care of her teeth (She really has nice teeth by the way so good job Tita Lita!)
Anyways, she likes cake pops, so these cute, pretty, pink cake pops were made as souvenirs for the mini baby shower my colleagues, bosses and I had for her this morning :) Thanks and good job to us all! As we have seen this morning, the surprise brought her to tears! (Awwww!)
Lolli-cakes, cake pops, cake balls, cake truffles or whatever you want to call it, is starting a craze. I've been really curious and eager to make them since I came across Bakerella and features from Cupcakes Take The Cake , only to find out that my cousins in the US have been making cake pops for quite sometime now. Way to go Kuya Aljan and Ate Eileen!
I am in no way able to give a history of it but I can tell you that my first few attempts failed. I thought it was so easy to make, but it wasn't. Talk about Disaster and Drama. My cousin said to just keep practicing. so I did.
I have used as guide the basic recipes from Bakerella, The Kitchn and sought help from the super detailed photos, troubleshooting, plus a video tutorial on how to dip cake pops from Veronica's Cornucopia. I was able to surpass the cake pop dilemma because of them. Thank you!
To make about 3 to 4 dozens, you need a cake baked in a 13 X 9 pan or two 8" round pans. If you have all the time in the world, you can bake from scratch. Bless your heart.
You can definitely use store-bought box mix, or grab a ready made cake.
In my case, I combined my left over cupcakes. I have been inspired by Chichajo's mission to resurrect left overs in any way possible, give them justice and honor in their new form. I've been trying to do so in left over dishes and now I have applied her wisdom to left over cakes and cupcakes by making these cake pops. You see, sometimes I crave for cakes or cupcakes, bake dozens of 'em (for cupcakes), eat them everyday for consecutive days and realize that I and my fellows here can't finish them off anymore. The little boy has his own share of eating them but me thinks he can't have sweets overdose!
So I had 15 pieces leftover chocolate cupcakes (9) and red velvet cupcakes (6)
- crumble them in a stainless steel bowl and set aside. My left overs amounted to just about half of the original basic recipe.
For the chocolate melt, I found chocolate bars easier to use so i used approx 500 grams of white chocolate bar, chopped and melted (double boiler) and I added about 1/4 teaspoon of red food color to make it pink. Pretty sprinkles c/o the ever reliable Manna Ingredients and the Cocoa Pantry.
When I saw the results of this latest attempt, I had a feeling of triumph as it's giving better texture, the chocolate hardens and there was no "falling off" happening. Cheers to that! :)
Here are some things I learned from blogs, watching tutorials on cake pops and my own disasters:
To make presentable cake pops, one must have patience and energy to go back and forth the fridge and working table. Prayer is very powerful.
If helper is available. By all means, let them help. Thank you Gemma and Abi. They designed their own cake pops but I have no permission to post it here :P
Best to use bars and melt them in a double boiler. I have tried to melt it in low heat in the microwave but it doesn't work well for me.
Whisk the melted chocolate a few times to release heat before dipping your cake balls.
Take out 2 or 3 pops at a time because in our kind of weather, the cake balls tend to soften fast, ergo the chocolate will not harden and the ball will fall off the lollipop stick (I am speaking from experience)
You need fast working hands when putting sprinkles as the chocolate melt dries fast because of cold cake ball.
Now with all these in place, I am looking forward to make another batch. The little boy is turning 4 next week and maybe I can give it a go if time permits! :)
Happy weekend everyone! :)
Tuesday, May 31, 2011
Tonkatsu

I was introduced to Japanese food about 20 years ago when my Papa took me for dinner in a small (and slightly hidden) Japanese resto in Cartimar market. There, I got my first taste of tempura. Later, we discovered other restos, tried out new dishes (and realized I can somehow eat sashimi, as well as realized that it's not all about tempura *lol*)
Despite my love for cooking, I never thought of cooking Japanese - until recently. Archie and I like to dine at Omakase and savor each and every dish we order. Tonkatsu is one of our favorites. As we know, Japanese food has special ingredients, and somehow can't be really substituted by a regular pantry staple. Thank God again for asian condiments at the supermarket! Last week, while doing my grocery I paid a visit again to the imported section lane. I felt like I was dumbfounded looking at all the stuff there. As usual, after having my second, third and fourth thoughts, my own free will let my hands take hold of a bottle of each: Rice Wine, Mirin and an all-around stir fry sauce. Pricey indeed, but then again they will be so useful anyway! Since husband likes Tonkatsu, I say why not give it a try? First, I searched for recipes online to get inspiration. So my friends, here's my first attempt on Tonkatsu:
Breaded Pork
500 grams pork tenderloin
flour
salt and pepper
2 small eggs
2 tablespoons milk
japanese bread crumbs
vegetable oil for frying
Tonkatsu sauce
1/4 cup ketchup
4 teaspoons mirin
4 teaspoons rice wine
4 teaspoons soy sauce
4 teaspoons Worcestershire sauce
1 and 1/2 to 2 tablespoons sugar
1/4 teaspoon ground allspice
1/4 teaspoon garlic powder
Heat Oil in a medium to low heat (giving you just enough time for it to be deep-fry ready, while you are coating all the pork)
For the pork, beat eggs and milk in a bowl, set aside. Place flour and japanese bread crumbs on separate plates.
Season the flour with salt and pepper.
Dredge pork first into flour, dip in egg mixture, and lastly, bread crumbs. Repeat process until all pork pieces have been coated. I learned from cooking shows to use one hand for the dry ingredients, and one for the wet. It works :D
Fry pieces until golden brown, drain-drain-drain on paper towels, cut in serving pieces.
For the sauce, mix all ingredients together until you achieve a smooth consistency. You can serve it on a smaller sauce plate or drizzle on top of the pork. Serve on top of steamed rice (preferable Japanese, of course!) and steamed veggies or shredded cabbage on the side!
For my next project, I shall search for dashi stock for my first attempt on Katsudon! Wish me luck! :)
Monday, May 16, 2011
Baked Salmon a la Conti's

I am definitely not one of the most updated people when it comes to the newest things in the universe: gadgets, movies, restos and famous resto foods. Name it.
So... new restos, food craze... I do have a wish list though ;)
It was just recently that I got to try Conti's baked salmon. Ok, I know you are just about to laugh or maybe you are now - hehehe that's ok! :)
I have been there waaaaay way back. I have heard of that baked salmon a couple of times from friends raving about how good and tasty it is and all that jazz. Fine. I just don't know why I didn't get to try it before.
so anyway, better late than never! Archie took me there for brunch just recently and finally, in my own taste buds, I'm already able to relate to my raving friends.
Sabi nga ni Kris Aquino once upon a time in a cooking segment in one of her talk shows--- ang sarrrrrrrrraaahhhhhhp!
*Fireworks*
At bilang nagustuhan ko siya, of course, I definitely had plans of re-creating it at home. Just to add a little personal touch, I put some breadcrumbs on top of the cheesy mixture.
Here goes the experiment:
1 salmon fillet
salt and pepper
Juice of half a lemon
Cheese Garlic-Mayo topping
½ block cream cheese - softened
About 3 tbsp mayo
1 to 1 and a half tbsp garlic chopped finely (if you want it more garlicky, just add a bit more)
About 3/4 cup Parmesan cheese (1/2 cup for the cream mixture and 1/4 for the topping)
Salt and pepper to taste
Breadcrumbs (optional. I like it w/ breadcrumbs, but the one served at Conti's does not have this)
Garnish - Buttered Vegetables:
Mixed vegetables
2 tbsp butter
salt and pepper to taste
Directions:
Rub salmon fillet with salt and pepper, then lemon juice for about 20 minutes
While salmon is marinating, mix thoroughly the cream cheese, mayo, garlic, parmesan cheese, salt and pepper. set aside.
Pan fry salmon about 2 to 3 mins on both sides
Pre-heat toaster/turbo. Assemble the fried fish on baking tray, then top w/ cheese garlic mayo mixture, sprinkle w/ remaining parmesan cheese and bread crumbs, bake in toaster/turbo for about 10 to 15 mins at 175C
Microwave mixed vegetables w/ 2 tbsp butter for about 20 to 30 seconds until butter is melted, season with salt and pepper.
Put out the baking tray and surround the baked salmon with butter vegetables. You can actually use other veggies like brocolli, cauliflower, baguio beans, sayote, carrots strips if desired.
It came out pretty much ok, and tastes fairly the same, less the paella rice as it is served in the resto.
If Salmon isn't too expensive, this can be a regular on my monthly menu! You might also want to try it if you are a Salmon lover! Hope you like it! :)
Now back to my resto-wanna-go-wish-list. By the way, Happy second birthday, Happy Tummy bloggy! :)
Sunday, May 8, 2011
Almondigas
Happy Mother's Day to all drop dead gorgeous fabulous rockin' super mommies out there and that means all of us moms and moms at heart (kapal? sinali ko talaga sarili ko?!)
As a tribute to my Mommy Tess, I would like to feature a meal I learned from her. Almondigas (some call it Albondigas) Actually, pina sosyal ko lang! We just call it Miswa at Meatballs. Hehehe!
Mommy prepares this at home back in my childhood days. Sometimes I volunteer to help when it's time to form the ground pork into balls. I remember I had so much fun getting messy with my hands while forming the meatballs! This is one of my comfort foods aside from Adobo. Whether it's summertime or the rainy season you can't go wrong with this. My mom's recipe even has chopped singkamas to add crunch in the meatballs (but I have no time to add them in my recipe anymore! :P )
the recipe here at home is easy to prepare, here goes:
Meatballs:
1/2 kilo ground pork
1 small onion, chopped finely (you can use half the onion and just keep the other half in the fridge if you don't want a strong onion flavor)
1 small carrot grated (this adds color and a little bit of sweetness)
Salt and Pepper to taste
About 2 teaspoons of cornstarch or flour as binder (sometimes I don't use this anymore and they still hold together w/o it)
Vegetable Oil for frying
For the miswa soup:
about 2 cloves garlic, minced
1 small onion, minced
2 small tomatoes, sliced
4 to 5 cups water
1 piece Chicken or Beef Bouillon Cube
about 100 g miswa noodles
Fish sauce to taste
Pepper to taste
Garnish:
a few pieces of spring onions, chopped
Mix the ingredients for the meatballs. Let it rest in the fridge for at least 30 mins. From experience, it's actually easier to form them when they are chilled. After the chilling process, form the mixture into 1 inch balls (or bigger if you want) and fry until cooked well. Drain on paper towels and set aside.
For the miswa soup:
sauté onion, garlic and tomatoes. Add water and bouillon cube and simmer for about 15 minutes. Then add the miswa noodles and simmer until cooked. Season with fish sauce and pepper to taste.
I like to put in the meatballs in a bowl of miswa soup and garnish it with spring onions. I also like to put some toasted garlic if it's available at home. yummy itey! :)
Mommy Tess has always been my idol and to her I owe a lot of my cooking know-hows. But that's not all! She became my instant Mom when my Mama went to heaven (she’s my Mama’s eldest sister). My Papa was very busy working to be able to provide for me that he couldn't really take care of me 24/7, as much as he wanted to, so for the first years of my life, he entrusted me to Mommy Tess and she worked together with Daddy Ed (her husband), my Lola (Nanay Floring) and my Yaya (my Mama’s Yaya too!), My Ate R and Kuyas J and O tagged along in the process. Boy, it took so many of them to raise the little me!
Wish I could tell you more about this part of my life but I don't want to take so much of your time! ;)
So anyway, this is for you, Mommy Tess! Thank you so much! I know you still cook miswa at meatballs there in California sometimes. I assume though you are now using ground chicken! ;)
To my Mama, thank you for your love and guidance, I know you are happy up there watching us. I know if WE had a choice, YOU are still here with us. Papa and I love you very much :)
Once again to all drop dead gorgeous fabulous rockin' super mommies… Happy Mother’s Day! ;)
Wednesday, May 4, 2011
Chicken In Pandan Leaves

I think this is the most real time entry I have ever made in my almost 2 years of (inconsistent) blogging :)
We had this for lunch last Monday and the little boy liked it that he ate it again the following day (there were some leftovers hihi.)
I was introduced to Thai restos back in college. I used to eat with my dad in Dusit Thani and my cousins in SukoThai. My all time favorite in the menu of both restos are the chicken pandan and bagoong rice. I would very much like to make my bagoong rice soon as it is a great pair for the chicken!
Since the sesame sauce needs tamarind paste, I wasn't able to try it yet a few years ago. There were limited to no Asian ingredients available in groceries back then and they are only available in specialty stores. Now I am happy to say that both supermarkets of SM and Robinson's near our place already offer Asian ingredients (yey!) Sheila and I spotted the Tamarind paste while we were doing our grocery and of course we grabbed it right away. :)
This came from my ever reliable Yummy Mag from the May 2009 ish. It can also be found online. The original recipe used chicken breasts fillets, but I used thigh fillets instead since I like it that it absorbs more flavor than white meat. Maybe that's why the little boy liked it as it's so tasty! Of course, I liked it just as much! :)
For the chicken you will need:
1/2 kilo chicken thigh fillets cut into squares (2X2 inches)
Pandan leaves for wrapping chicken, washed and towel dried
vegetable oil for frying
For the marinade:
1 1/2 tablespoons cornstarch
1 1/2 tablespoons oyster sauce
1 1/2 tablespoons soy sauce
1/4 teaspoon pepper
2 teaspoons sesame seeds
For the sesame sauce:
3/4 cup warm water
1/4 cup tamarind paste
1/4 cup brown sugar
1 tablespoon oyster sauce
1 tablespoon fish sauce
1 tablespoon sesame oil
1 teaspoon sesame seeds
Procedure:
In a bowl, combine ingredients for the marinade. Add chicken and marinate for at least 20 minutes or overnight. (I marinated it for about 2 hours and it was really tasty, maybe because of chicken thighs?)
While the chicken is marinating, I already prepared the sauce: In a small saucepan, pour warm water over tamarind paste and let it sit for 5 minutes and add the rest of the ingredients. Simmer for 10 minutes. Serve on the side.
After the marinating process, wrap the marinated chicken in pandan leaves. It's actually good to use long pandan leaves so you can tie both ends to lock it. Deep-fry in medium hot oil until golden brown.
I loved the smell of the kitchen while i was frying the chickies. The sweet smell of pandan really rocks!
Best served with hot rice... better yet, bagoong rice! :) Enjoy!
Saturday, January 29, 2011
Pork Cordon Bleu and Pesto Cream Cheese Dip

Happy New Year! :)
I guess my goal to write often will always be part of my wishlist *lol*
A lot of things get in the way here and there but I would still love to spare a little time sharing something here - like this super easy and cheesy dish! It's fun to make and it's not the same as what we're used to, which is chicken. It was our helper back in my highschool days who taught us how to make these. The mini "pork rolls" were sealed by toothpicks and fried in oil. This version has a little more to it - the bread crumbs, eggs and the works, plus pesto cream cheese as dip. Yum!!!
Pork Cordon Bleu
about 8 pieces pork tenderloin cut thinly (size is about 4 X 5) or thin pork chops w/o the fat and skin
salt and pepper to season
quick melting cheese, cut in sticks (size that fits in pork when you roll it, i was able to consume 1/2 of the cheese bar)
toothpicks (for sealing)
flour
2 eggs
Japanese bread crumbs / Panko
Vegetable Oil for frying
Pesto Cream Cheese Sauce
1 tbsp butter
1/2 cup of cream cheese
1/2 cup milk
2 tbsp ready made pesto
salt and pepper to taste
- season the pork w/ salt and pepper, place the cheese sticks in the middle, fold sides and ends over cheese and roll up; secure each with a toothpick. Dip roll-ups in flour, then egg mixture, then roll in crumbs and fry until golden. Drain well. Remove toothpicks carefully for presentation purposes!
*you can put garlic bits or bacon bits or what have you in the rolls ups together with the cheese!
- on low heat: melt butter in pan, add cream cheese and milk, simmer until cheese has melted, then add the pesto, salt and pepper to taste and serve w/ pork cordon bleu
Cheese is really overflowing in this recipe but it won't hurt our diet if this will be eaten occasionally! :) Serve with hot rice or can be served as pica-pica too! I know...the holidays are over and summer is definitely coming (beach! beach!). But this does not stop me from eating anything delicious! This is where the 3-day diet programs and tankinis come in! :P
Monday, December 27, 2010
Happy Holidays! :)

Merry Christmas everyone! :)
Here's something our family gave to our relatives for this holiday season - Banana Chocolate Chip cupcakes with Chocolate Buttercream. As always, Banana and Chocolate go well together, thus we have these cupcakes, and how much more good will it be if you top some chocolate butter cream on it? :)
I used my favorite Banana Chocolate Chip bread recipe for the cupcakes. Then I just reduced the time to 20 minutes, rotating the pan halfway. 1 recipe makes about 15 cupcakes. The chocolate butter cream recipe was inspired by two recipes.
It's still a busy time now and hope to be back soon!
Have a blessed, healthy and happy 2011! :)
Monday, September 27, 2010
Home Made Pan de Sal

Isn't it a such wonder to be able to make your own bread? I have been inspired by several people whom I think have considered bread making from home a passion and another level of therapy. I believe I can consider it the same- after so many repeats of this well-loved Filipino Pan de Sal.
During my childhood, I used to wake up with either fried rice or pan de sal on the table. I love them both of course. Fried rice has always been part of my breakfast list until now. As for pan de sal in this present time - as much as I love to have it all the time, there is no panaderia/bakery nearby. I much more like having newly baked pan de sal than having commercial ones in stock. In the neighborhood where I grew up, when you walk out of our street, there's plenty of bakeries left and right! Oh boy, who would not want to wake up smelling freshly baked bread?
Glad I found this easy recipe from Panlasang Pinoy. Kuya Vanjo is a genius. His recipes and videos are very helpful and easy to understand. Makes you feel like some sort of an expert already. Thanks Panlansang Pinoy!
This version below has a little more sugar since I like my pan de sal sweet ;) I arranged the recipes in parts and in order of the procedure.
Ingredients:
1 tbsp white sugar
2 and 1/4 teaspoon active dry yeast
1 ¼ cup fresh milk, warm
2 cups MAYA all purpose flour
2 cups bread flour
½ cup white sugar
1 tsp salt
1 tsp baking powder
5 tbsp butter, melted
1 tbsp cooking oil
1 piece raw egg
Approximately 1/2 cup flour for dusting flat surface
1 cup bread crumbs for coating
Procedure:
1. Prepare about 3 baking pans with wax paper. Set aside.
2. Combine the yeast, 1 tbsp sugar, and warm milk and stir until the yeast and sugar are fully dissolved (Set aside and continue the rest of the steps. Mixture will be bubbly and frothy in about 10 minutes, just in time after you have prepared the other steps!)
3. In a large mixing bowl, combine the dry ingredients starting with the MAYA all purpose flour, bread flour, 1/2 c sugar, salt, and baking powder. Mix well with a whisk.
4. Add the melted butter, cooking oil, egg and yeast-sugar-milk mixture in the mixing bowl with the dry ingredients then mix again until dough is formed.
5. In a flat and floured surface, knead the dough until the texture becomes fine.
6. Mold the dough into a ball. Cover the mixing bowl with a damp cloth and let the dough rise for at least 1 hour to 1 hour and a half in a warm area.
- You may opt to prepare the dough in the evening for a "slow rise" in the fridge (covered with cling wrap) until the following day.
7. After the rising process, put the dough back to the flat and floured surface and divide into 4 equal parts
8. Roll each part until it forms a log
9. Slice the log diagonally or horizontally (These slices will be the individual pieces of the pan de sal)
10. Roll the sliced dough over the breadcrumbs and place in a baking tray with wax paper. Sliced part facing up! (make sure to provide enough space between each sliced dough because they will have a second rise)
11. Cover the prepared dough slices with a slightly damp cloth and set aside for another 15 to 20 minutes for the second rise.
12. while the dough is on its "second rise process", pre-heat the oven at 375F or 190C
13. After the second rise, pop them in the oven and bake for 15 minutes. You can rotate your pan de sal tray on the 10th minute to achieve an even texture and color.
14. Turn off the oven and bring out the freshly baked pan de sal. Makes about 35 to 40 pieces.
Best served with butter and jam or marmalade, bacon on the side and your favorite coffee or hot chocolate!
I made wheat pan de sal once - the dough is heavier and it needed more moisture and more time to rise and bake than using bread flour + all purpose flour.
Making pan de sal almost every week brings value added cheers and fun at home, especially to my little big boy who likes bread...


Here's to wishing more opportunities or should I say stolen moments of MYOB (making your own bread) and eating them too :)
Will be here again soon :)
Sunday, May 16, 2010
Adobo Flakes and Blog's 1st Birthday!

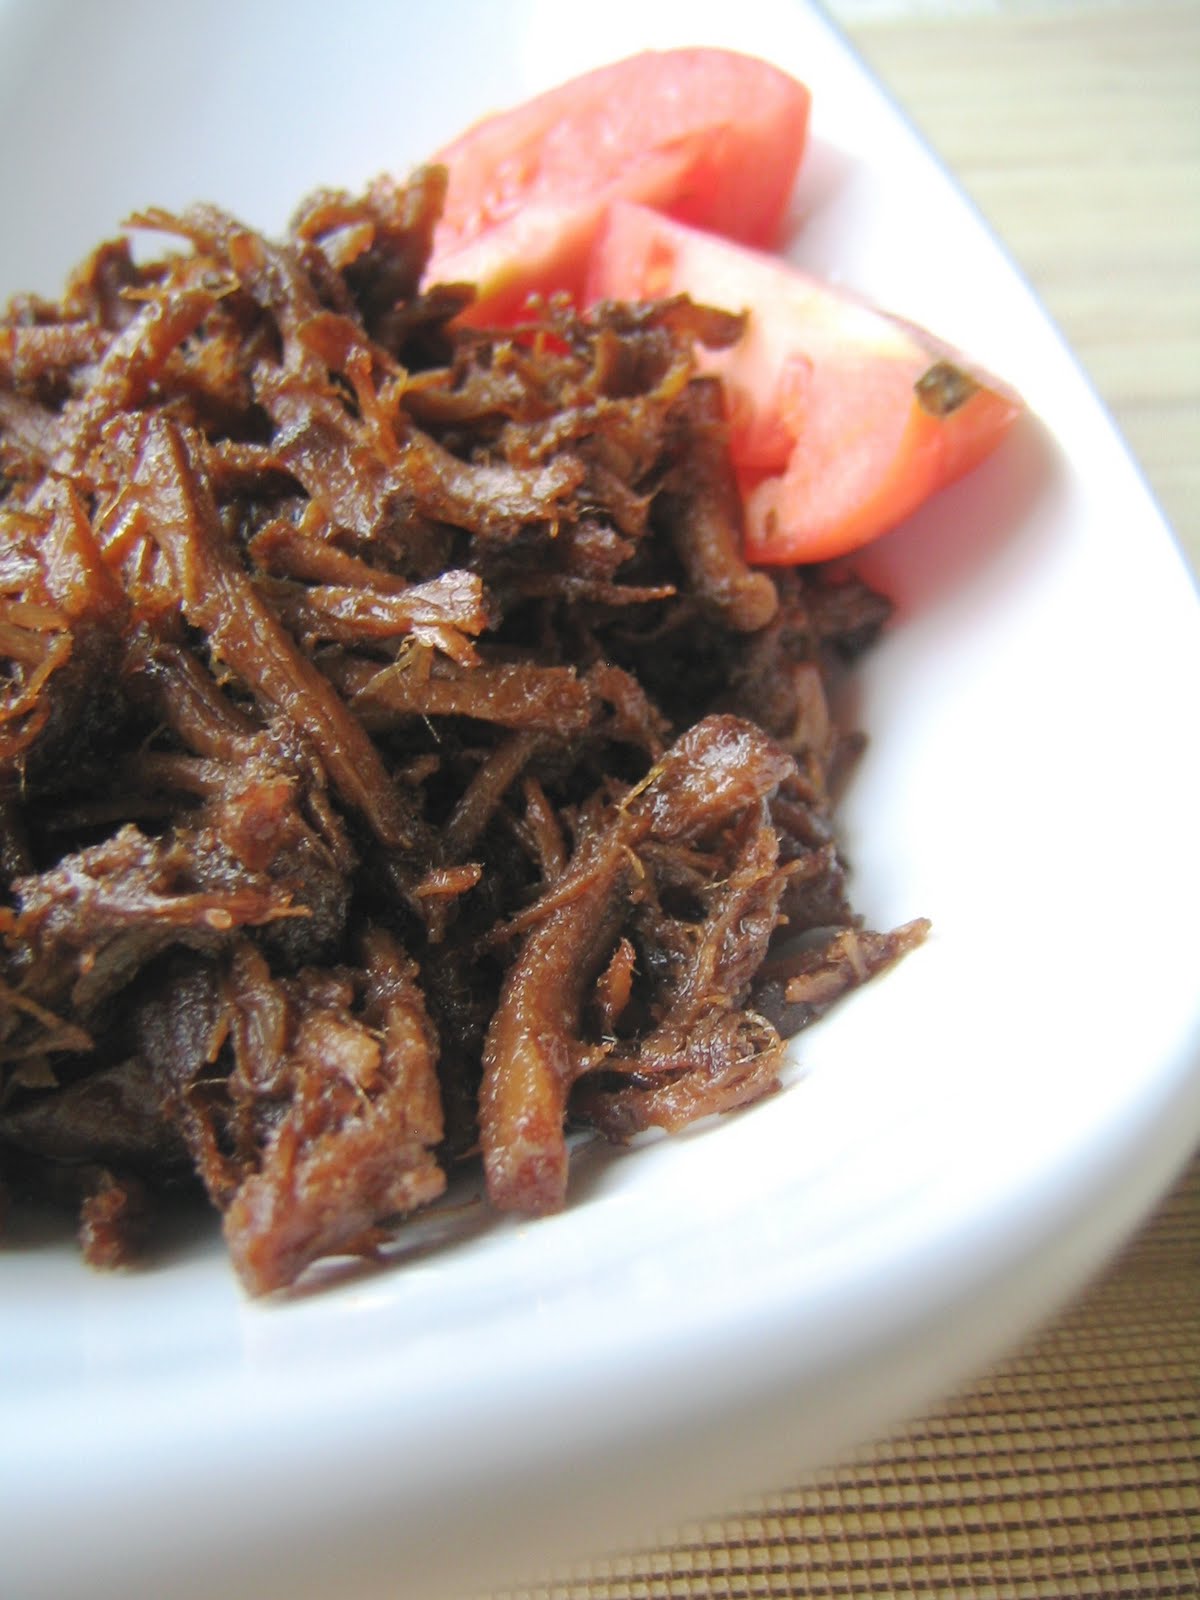
It was just last year when The Happy Tummy Kitchen blog was born. And my first entry? Adobo. So how about paying tribute to my all time favorite dish on my blog's first birthday? This time, it's all flaked up! I have been experimenting on adobo flakes for quite sometime and thought I have figured out an easy way to do it - without having to use forks and fingers to flake the meat.
I prefer to use pork as most would use chicken for adobo flakes. I use the big pork cuts from the grocery - either Lomo or Kasim, boil them or pressure cook them first to make them really really tender, drain the liquid (store stock/broth for future use in freezer) then start cooking your adobo, the way you like it, just simmer until it becomes a little dry, mix, mix, mix and press the meat with your cooking spoon/cucharon. If the meat is really tender, it will eventually loosen up and become thready/flaky and will fry in its own oil :)
You might also want to try the sandwich version. Just ready 2 bread slices: layer 1 slice, then put mayo side up, adobo flakes, 1 lettuce leaf , about 2 tomato slices, then 1 slice of bread with mayo spread side down... then potato chips on the side. Lovely. :)
Sharing with you a photo of my sandwich, back in 2008:
Yep, that's moi!
How time flies! It has been 365 days since I started this little hobby. I wish I could have shared more during the past months. Forgive me for my promises were broken, my goal of reaching a hundred recipes in 1 year - gone with with wind hehehe but it's not over of course! For now,there are just so many things to take care of. I do wish that soon when all things fall into place, there will be much more time again to doodle my little dishes-worth-sharing-with-you :)
Thank you to the amazing bloggers who have been my source of inspiration and got my drive to start my own food journal. And to my good friends who drop by, thank you so kindly! :)
See you soon! :)
Wednesday, April 21, 2010
Lemongrass Chicken Barbecue

Goodbye March and hello there April - well, it's already almost goodbye too. I didn't know it would take me this long to come back here. Well, aside from my clingy little boy getting clingy-er everyday, there's still a lot more going on. Happenings so nice to know and chat about. Some you'd rather not even think about - though they haunt you in your sleep blah blah blah! :P
I need to get back to my sanity. Like right now. So, here I am again. I don't have any more excuses!
Before I continue - I just want to share some blessings during the past month: Archie got me a flat screen for my PC as a "wala lang" gift (MS Excel is more fun!) , a long keyboard wrist pad with massage beads (because I am scared to have carpal tunnel syndrome) and a small LED light lamp (so I can sneak in my station while the little boy is asleep and no big lights on!). Yey! Thank you bunnywabbit! :)
Ok back now.
My kitchen adventures have been intensified because of this wonderful magazine, and great food blogs and recipe sites. I have always been using usual Barbecue commercial marinades but when I found this, I felt like I have to try it right away, and it was a success indeed!
Lemongrass Chicken Barbecue
original recipe: page 30, Yummy Magazine Jan/Feb 2010
8 pcs boneless chicken thighs/breasts, trim excess fat and cut into 1 1/2 inch pcs
salt and pepper to taste
3 tbsp finely chopped lemongrass/tanglad
3 tbsp minced garlic
2 tbsp spring onions, chopped
3/4 cup barbecue marinade (I used Mama Sita's)
2 tbsp brown sugar for a little sweetness (optional, not part of original recipe)
- lightly season chicken with salt and pepper. I had mixed chicken thighs and breasts (Archie likes white meat, while I like red)
- in a bowl, mix together lemongrass, minced garlic, spring onions and barbecue marinade. You may want to add brown sugar if (like me) you like your barbecue sweet :) Mix well.
- Pour marinade on chicken and mix altogether with your clean hands. Marinate for at least 6 hours or overnight.
- Skewer chicken , about 3 to 4 pieces per stick, grill over charcoal or grill pan, for about 5 to 6 minutes skin side down, then for another 3 to 4 minutes, on the other side. Brush chicken with left over marinade once in a while, while grilling.
For my friends who use turbo broiler - this is my homework. I shall update you all as soon as I get this done! :)
This is something new and something to look forward to on the next grilling session!
Belated happy summer to all. The heat is really scorching hot, so is the barbecue!